You
could use the gift tag already attached to gift bags, but using one of these homemade gift tags is so much more personal. Plus, if you are reusing a gift bag, then most likely the tag is used, so you could use one of these. These are very simple to make, and I had a lot of fun making them!
You can decorate them, then add your name and a message on the back before. You can add these to all your presents!
For the dough you will need:
-1 cup of salt [1/2 cup]
-2 cups of flour [1 cup]
-1 cup of lukewarm water [1/2 cup]
This makes 100 small gift tags (each 1 1/2 inches in diameter). The half recipe, which will make around 50 gift tags is on the right in brackets.


First mix the flour and salt together. Then slowly add the water while mixing. I found that it was easier to just use your hands at the end when it becomes a dough. I used a wooden spoon at the beginning to mix .
If you watch my video, (Not uploaded yet, watch for it to be linked here or in the video bar at the bottom) I use a silicon sheet to roll out my dough. You could use a plastic cutting board, parchment paper, wax paper, or any other material that the dough will not stick to.
While cutting shapes out, make sure you either keep the surface floured or you continuously refrigerate the dough, because it will get sticky as you continue to touch it. I used cookie cutters and a knife to make my shapes. If you are making circle tags, there are many alternatives to a cookie cutter such as the lid of a large glue stick, or any other object with a circular lid.
I lined a baking sheet with parchment paper before transferring the tags to it. You could cut out the dough on the parchment paper, so then you would not need to move them. While you cut out your gift tags, preheat the oven to 260-350 degrees Fahrenheit (The temperature depends on how long you want them to bake and what color you want them. The higher the temperature, the browner they get, but the faster they harden.)
I used a suncscreen can as a rolling pin to roll out the dough before I cut it out. To move them onto the baking sheet, I removed the excess dough around the cutouts and then transferred the tags.
Once you are done cutting out all of the tags, you will need to punch a hole at the top. You can use a straw, pencil, or anything else that will make a small hole at the top.
 |
The pin is for later- to fix the holes if they are messed up while they bake
 |
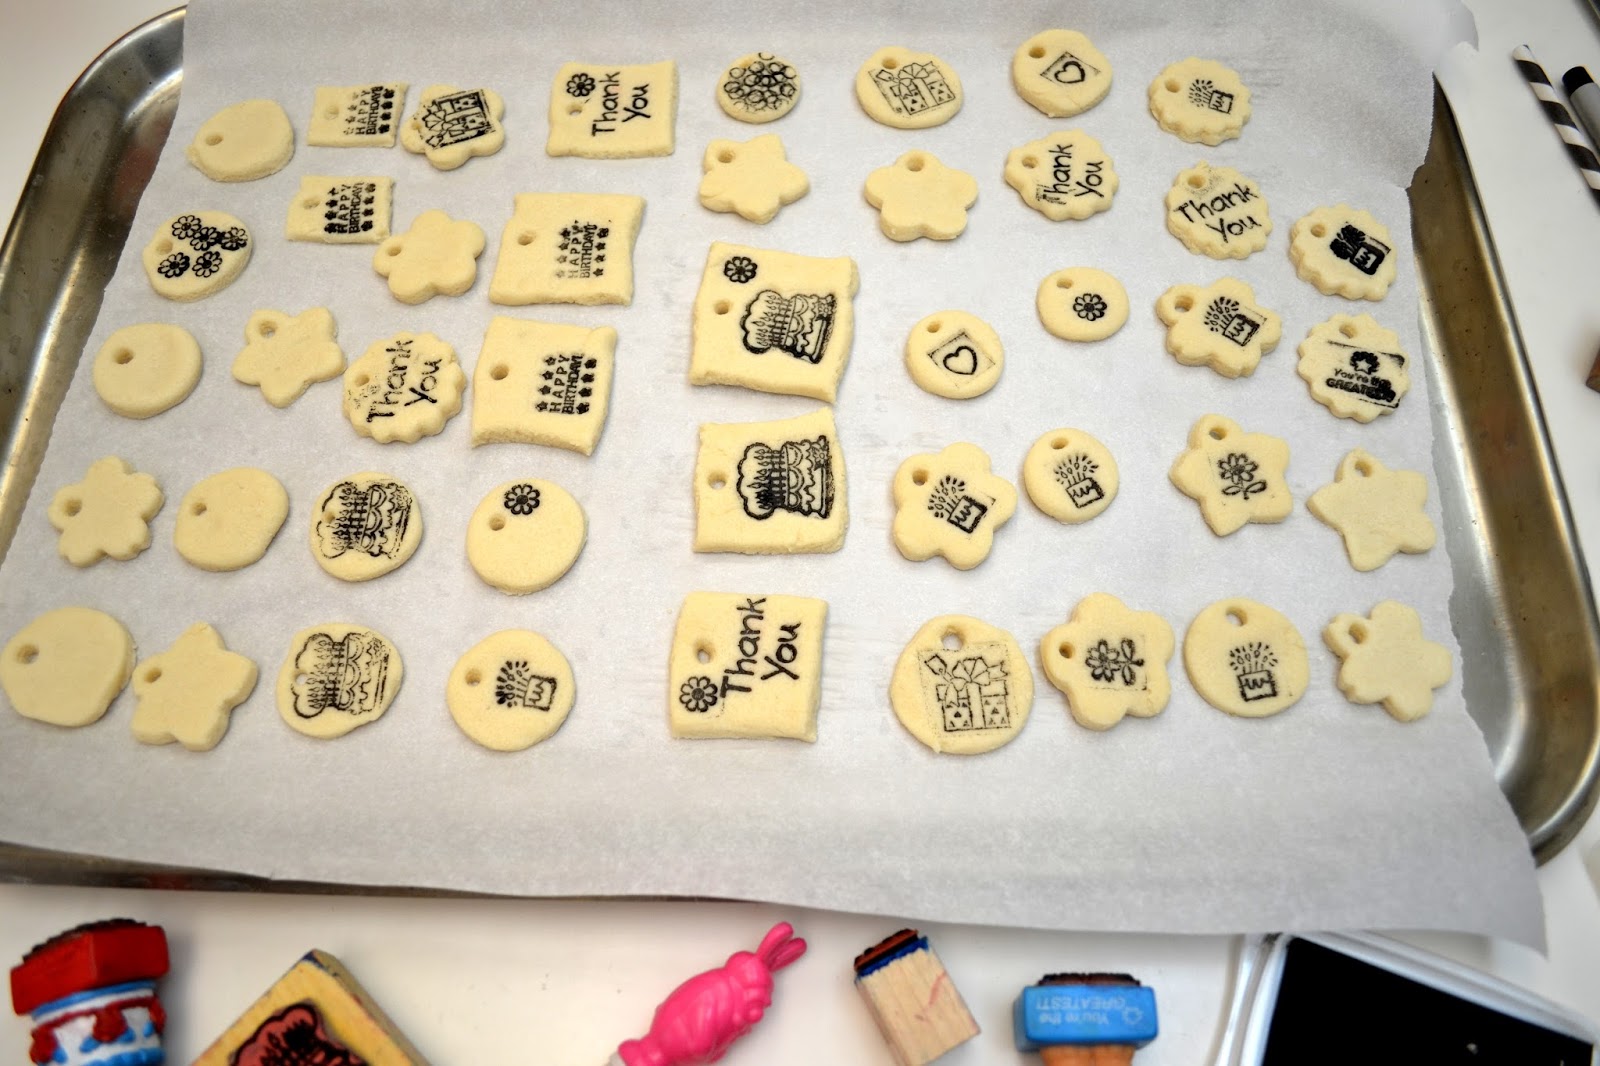
Right before you put them into the oven, add whatever stamps you want to the tags. I thought about what I would be using these tags for and did some with a "thank you" stamp, birthday related stamps, flower stamps, and some I left blank.
For baking times it depends on what temperature you have the oven set at. I did mine at 260 degrees Fahrenheit, and it took about 2 hours for them to be completely done. To check if they are done, you can lightly press in the center, if it is not solid, they are not done. You can also tell if they are done by the color, they should be a golden brown when finished baking.
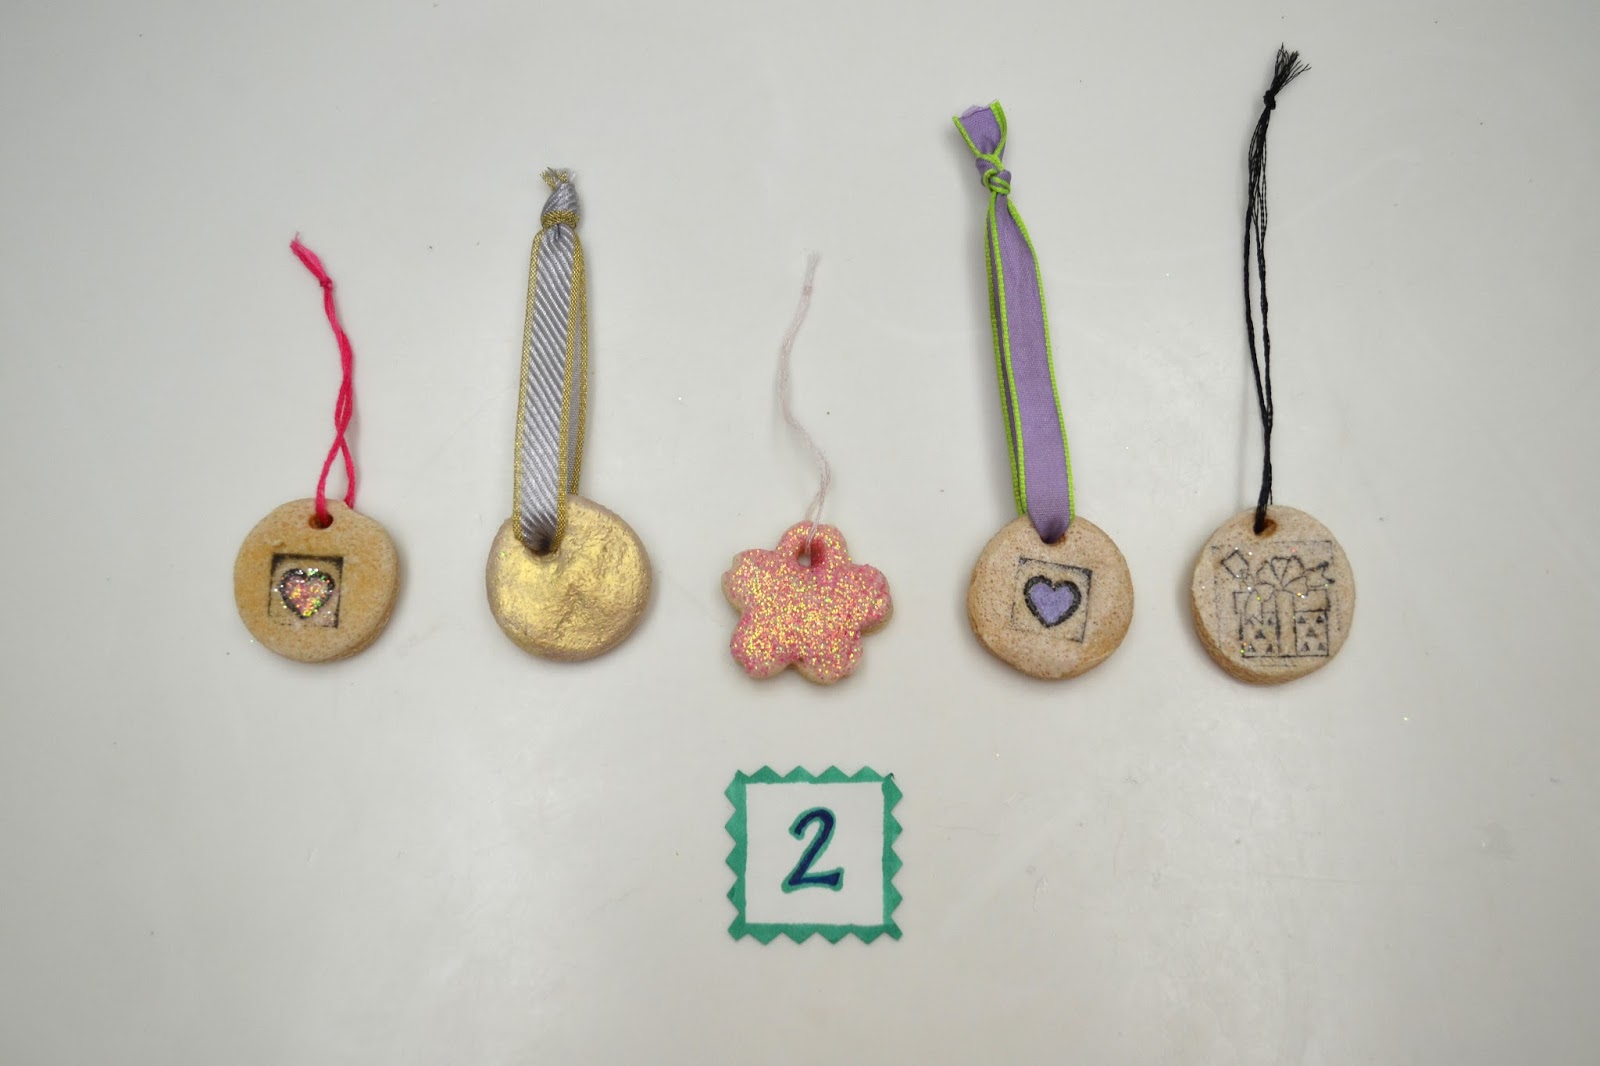
Once they have cooled, they will be rock solid, and you can decorate them with:
-Glitter
-Acrylic paint or puffy paint
-Sharpie or markers
Some tags I painted the whole thing with acrylic paint. Others I added paint accents to the stamp designs and then did a layer of Mod Podge over it.
For glitter, paint a layer of Mod Podge, pour glitter over the tag, tap off the excess glitter, and then put another layer of Mod Podge over the glitter to seal it in.
For all of my gift tags, I did a layer of Mod Podge on both sides so they had a nice finish. It is really fun to get creative make each tag unique! When you put these tags on presents, you can add a message to the back with a permanent marker. (The tag pictured does not have Mod Podge on the back)
Once these are dry, you have to attach a string to the hole at the top. I used embroidery thread and ribbons. All of my strings were about 14 cm long.
Sometimes the dough fills up the hole in a thin layer, so I used a large needle to remake the hole.
There were four ways that I attached the string to the tags. The first way is to just thread the string/ribbon Through the hole at the top. Then, to attach it to a gift bag you bring the ends together around the gift bag handle, and knot it.
For the second tie, you bring it through like the first tie, but knot it at the top. To attach it to the bag, you bring the knotted end around the gift bag handle and push the tag through the open hole. (Watch my video if any of the ties or ways to attach are confusing).
The third tie is the same as attaching the second tie. Fold your string in half, push it through the hole (I sometimes needed the needle to push it through) and bring the two ends of the string through the open loop that was made by pushing it through. Attaching this is just like the first tie, bring the two ends around the handle of the gift bag and tie them together.
The fourth tie is the same as the third one, but with a knot at the top. Then you attach it just like the second tie, by putting the knotted end over the handle and bringing the tag through the loop.
These tags are also super cute on envelopes; hole punch the corner of the envelope, bring the ends of the string through, and tie it. Just remember you can't send these in the mail!
Thank you for reading this post! I hope you try this at home, I had a blast decorating all of them and I can't wait to use them! I am still working on the video for this, but I hope my instructions on here are helpful. If you try this or any of my other DIYs make sure to send me a picture at diysbymegid@gmail.com. Follow by email to receive a notification every time I do a new post!


.JPG)


.JPG)


.JPG)


.JPG)


No comments:
Post a Comment